

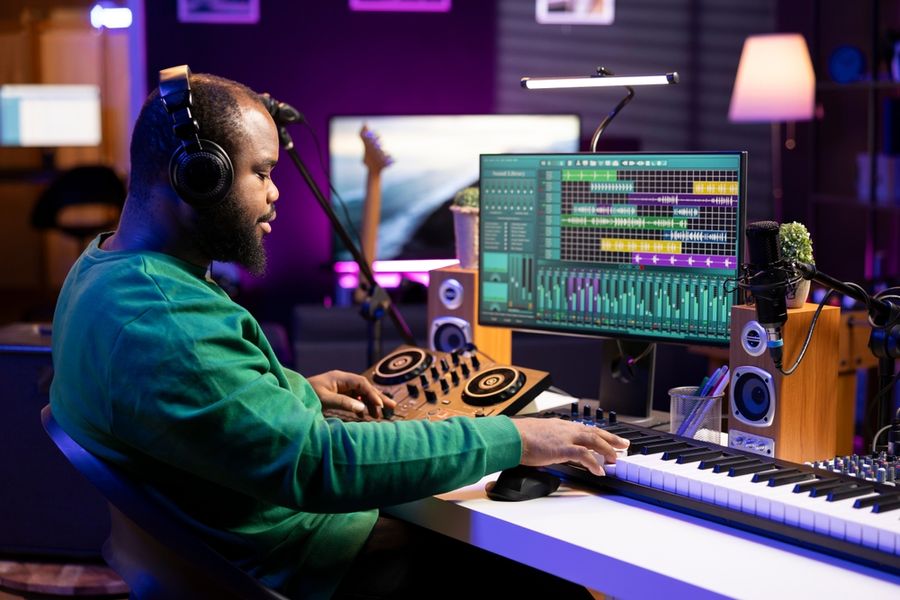
A useful home studio does not need to dominate an entire bedroom or office. For many recording projects, a computer, compact audio interface, versatile microphone, headphones, and a few carefully chosen accessories can cover the essentials. The goal is to build around the music you actually make instead of collecting gear for hypothetical needs. With a streamlined setup, thoughtful room placement, and multipurpose equipment, you can record, edit, and monitor comfortably without turning the room into a warehouse.
Start With the Computer You Already Use
Before buying studio hardware, decide what your existing computer can handle. If it already runs your preferred recording software reliably, there may be little reason to create a separate studio computer. Keeping recording, editing, virtual instruments, and effects inside one machine immediately reduces the amount of physical equipment the room needs.
Choose a digital audio workstation around the projects you plan to make rather than the longest feature list. A songwriter recording vocals and guitar may need only basic multitrack recording, editing, effects, and mixing. Electronic music can place greater emphasis on MIDI sequencing and virtual instruments.
Keep your working setup equally restrained. Instead of connecting every peripheral you own permanently, leave frequently used devices attached and store occasional equipment elsewhere. A clear desk makes a small studio easier to use and leaves space for instruments when recording.
Let One Compact Interface Handle the Connections
An audio interface acts as the link between microphones, instruments, headphones, speakers, and your computer. For a solo home studio, a large rack interface may provide far more inputs than you will regularly use.
A compact two-input interface can accommodate microphones as well as line- or instrument-level sources while also providing a headphone connection and outputs for powered monitors. The Scarlett 2i2 4th Gen, for example, measures about 7.1 inches wide by 4.6 inches deep and weighs approximately 1.3 pounds while providing two microphone inputs, two line/instrument inputs, a headphone output, and two balanced line outputs.
That type of footprint allows the interface to remain within reach without occupying much desk space. Before buying, count how many sources you genuinely expect to record simultaneously. If you usually record one voice or instrument at a time, extra channels may spend most of their life unused.
Choose One Microphone That Can Cover Several Jobs
A collection of specialized microphones can grow quickly, so begin with one model that suits your most common recording tasks. If you record vocals, guitar amplifiers, acoustic instruments, or percussion, a versatile microphone can handle several roles while you learn how placement affects the result.
The SM57 is one example of a cardioid dynamic microphone designed for instrument and vocal recording. Its applications include drums, guitar amplifiers, acoustic instruments, and vocals, while its directional pickup pattern emphasizes sound arriving from the front and reduces sound arriving from other directions.
The best first microphone still depends on what you record most often. Someone focused almost entirely on spoken voice may make a different choice from a guitarist recording loud amplifiers. The important point is to avoid buying several microphones before you know what the first one cannot do.
A stand, appropriate cable, and pop filter when needed may complete the recording side of the setup without adding another piece of major equipment.
Use Headphones Before Filling the Desk With Speakers
Studio monitors are valuable, but they take up physical space and require thoughtful positioning. In a small multipurpose room, closed-back headphones can provide a simpler place to start.
Closed-back designs are particularly useful during recording because their enclosed earcups attenuate sound traveling both into and out of the headphones. The DT 770 PRO, for example, uses a closed, over-ear design and is available in several impedance versions for different types of playback equipment.
Headphones also free the desk from speaker stands, cables, and additional power connections. They are not a perfect replacement for evaluating a mix on speakers, but they can keep an early home studio considerably simpler.
If you eventually add monitors, buy them because speaker-based listening has become necessary for your work rather than because monitors appear on a standard studio-equipment checklist.
Organize the Room Before Buying Acoustic Treatment
Recording equipment is only part of a studio. The position of your desk, speakers, microphone, and other furniture can affect how practical the room feels and how useful it is for listening.
If you use monitors, begin with the listening position centered as symmetrically as the room allows. Keeping the distance from each monitor to your ears equal and positioning the tweeters around ear level can create a more consistent listening arrangement. Hard surfaces can also produce reflections that interfere with what reaches the listening position.
That does not mean covering every wall with foam. First arrange the room sensibly and listen for actual problems. Existing rugs, curtains, bookshelves, and upholstered furniture may already change how reflective the space feels.
If treatment becomes necessary, add it to address specific reflection or low-frequency problems rather than purchasing decorative panels simply because they make the room look like a studio.
Keep Accessories Multipurpose and Easy to Store
Small accessories can create as much clutter as major equipment. Microphone stands, laptop stands, cables, adapters, MIDI controllers, instrument stands, and power supplies all require somewhere to go.
Use cable ties or reusable straps to bundle excess cable length and keep only commonly used connections at the desk. A drawer, storage box, or small shelf can hold adapters and spare cables instead of leaving them permanently spread across the workspace.
Whenever possible, choose equipment that performs more than one role. A compact MIDI controller can handle virtual instruments and software controls, while a sturdy microphone stand may accommodate different microphones rather than remaining dedicated to one setup.
Build Around the Music, Not the Equipment
A simple home studio works best when every permanent item earns its place. Start with the computer and recording software you need, add an interface sized for your normal sessions, choose one versatile microphone, and rely on headphones until speakers solve a genuine problem.
Expansion can happen gradually as your projects reveal actual limitations. When a second microphone, monitor pair, MIDI controller, or acoustic treatment becomes necessary, you will know exactly what problem it needs to solve. Building that way keeps the studio focused on recording music instead of collecting equipment—and leaves enough room to actually enjoy working in it.